3D-Printed FPV Freestyle Drone - Personal Engineering Project
Project Objectives:
Design and manufacture a 3D-printed frame for an FPV freestyle quadcopter
Perform engineering analysis and simulations to validate frame design
Use testing data and failure analysis to support the design refinement process
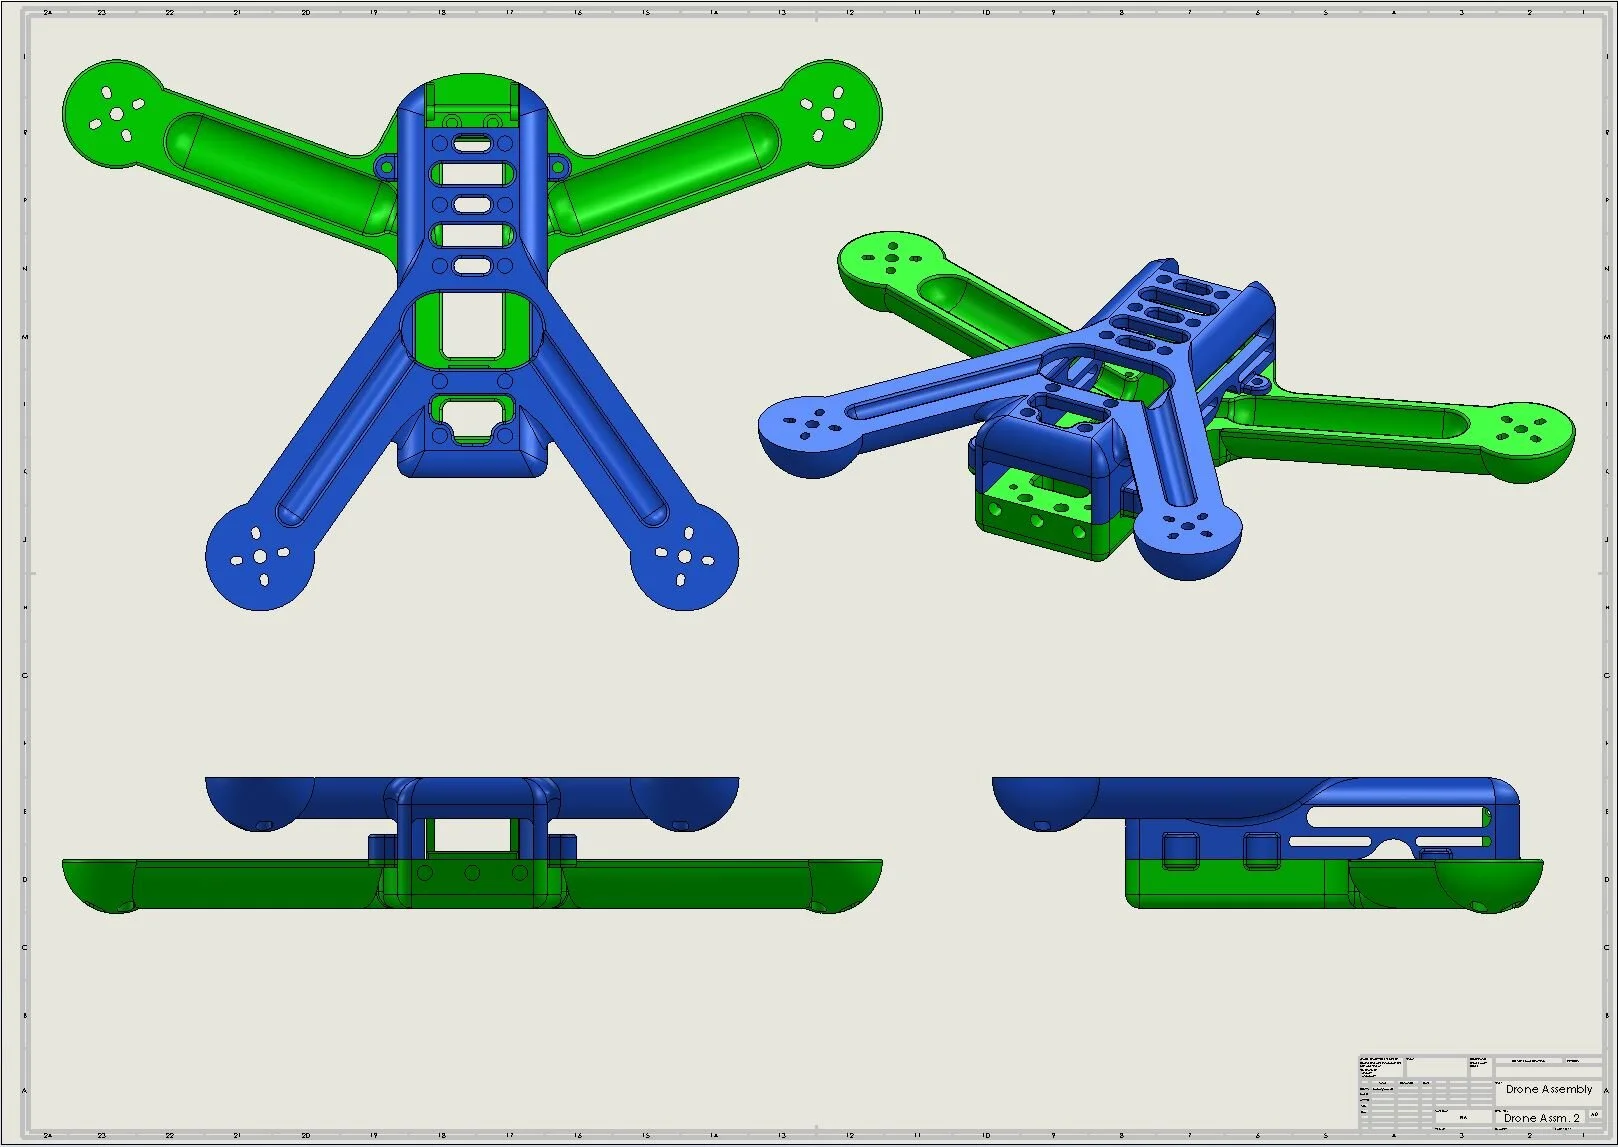
Frame Design
The first stage of this project involved designing the 3D-printed frame. Unlike the popular carbon fiber frames that saturate the frame market, this frame could not be a simple, flat extrusion of a profile sketch. Instead, I had to use my knowledge and intuition of solid mechanics and aerospace structures to design a frame that could be made of PLA plastic and still withstand the stresses of inherent to drone flight and the occasional crash.
Simulation Analysis
Once the frame was designed, it was necessary to validate that design with engineering calculations and simulations. In addition to basic solid mechanics checks, various finite element analyses were performed within SolidWorks Simulation- including drop tests.

Parts Ordering
In order to have a well-functioning drone, I had to obtain parts that were both adequate for the frame and the style of flying. All the parts had to be compatible with one another as well. This process proved to be more difficult than initially anticipated, as there is a fairly steep learning curve. Once proper component research had been completed, a comprehensive and optimized bill of materials was produced and orders were sent out.

Frame Manufacturing
With the parts on their way, the next step was to start production on the frame itself. I was able to use my additive manufacturing experience to generate quality frame components in a relatively short amount of time.

Electronics Assembly/Config
Once the frame was printed, it was necessary to assemble the electronics and configure their firmware. The components of the electrical subsystem included the flight controller, electronic speed controller board, battery, FPV camera, radio receiver, and video transmitter.

Flight Testing & Failure Analysis
With the frame and electronics assembled, it was time for the fun part: testing! The drone’s first flights went exceptionally well; the craft handled well and all components behaved as expected. At the end of the first flight session, however, the drone suffered a hard crash and one of the arms failed at the motor mount. This provided a great opportunity to perform failure analysis and apply the lessons learned to future revisions of the design.

Frame Design Refinement
The failure analysis revealed opportunities for improvement to the design, including the expansion of cross-sectional areas near motor mounts and the removal of unnecessary material to lessen the drone’s weight. These improvements, as well as several quality-of-life changes, were incorporated into the second design iteration of the drone frame. This version of the frame has flown flawlessly, even after several hard crashes.